

Key Takeaways
Why Your Driving Position Matters More Than You Think
Most drivers set up their seat once - usually when they first get the car - and rarely revisit it. But your driving position directly influences two things: how much control you have over the vehicle in an emergency, and how your body interacts with the car's safety systems if a crash occurs.
Seatbelts and airbags are engineered to work with a driver sitting in a specific position. Too far from the wheel, and the airbag may not protect you effectively. Too close, and you're in the airbag's direct deployment zone. A reclined seat changes where the seatbelt sits across your body, which affects how well it manages crash forces.
Beyond crash dynamics, posture affects fatigue. Drivers sitting in a poorly adjusted position - hunched forward, reaching for the wheel, or slouching back - tend to tire faster, which degrades concentration on longer journeys. Getting it right from the start is one of the simplest and highest-impact habits you can build. If you're new to car ownership generally, the full guide for new drivers covers additional fundamentals worth reading alongside this one.
What you will need
Step-by-Step: Setting Up Your Driving Position
Work through these steps in order. Each adjustment builds on the one before it - changing your seat distance after you've set your mirrors, for example, means your mirrors are now wrong for your new position.
Airbags and Hand Position Are Linked
Placing your hands at ten-and-two, once standard advice, puts your arms directly in the airbag deployment path. Modern guidance - including from the National Highway Traffic Safety Administration (NHTSA) - recommends nine-and-three to reduce the risk of hand and arm injuries if the airbag deploys. This is one adjustment that genuinely affects crash outcomes.
Set your seat distance from the pedals
Slide the seat forward or backward until you can press the clutch (if driving a manual) or the brake pedal fully to the floor with a slight bend remaining in your knee - roughly 20 to 30 degrees. Your leg should never be fully extended at full pedal travel. A locked-out knee reduces reaction time and increases injury risk in a collision.
Adjust seat height
Raise or lower the seat so your eye level sits roughly two to three inches above the steering wheel's top rim. You should have a clear, unobstructed view over the hood and out through all windows without craning your neck. If your vehicle has a height-adjustable seat, use the pump lever or electric switch and check visibility out of the windshield before locking in the position.
Set the seatback recline angle
Recline the seatback so it sits at roughly 100 to 110 degrees from vertical - a very slight lean back, not an upright 90 degrees and certainly not a relaxed recline. At this angle, your arms should reach the steering wheel with a comfortable bend at the elbow (roughly 90 to 120 degrees) when your wrists rest on the top of the wheel. An overly reclined seatback reduces your ability to steer quickly and places you farther from the wheel's optimal control zone.
Position the headrest correctly
The headrest - more accurately called a head restraint - is an active safety device. Adjust it so the center of the cushioned pad aligns with the center of the back of your head, and ensure it sits as close to the back of your head as comfortable. A headrest set too low increases whiplash injury risk because your head passes over it in a rear-end collision rather than being supported by it.
Adjust the steering wheel position
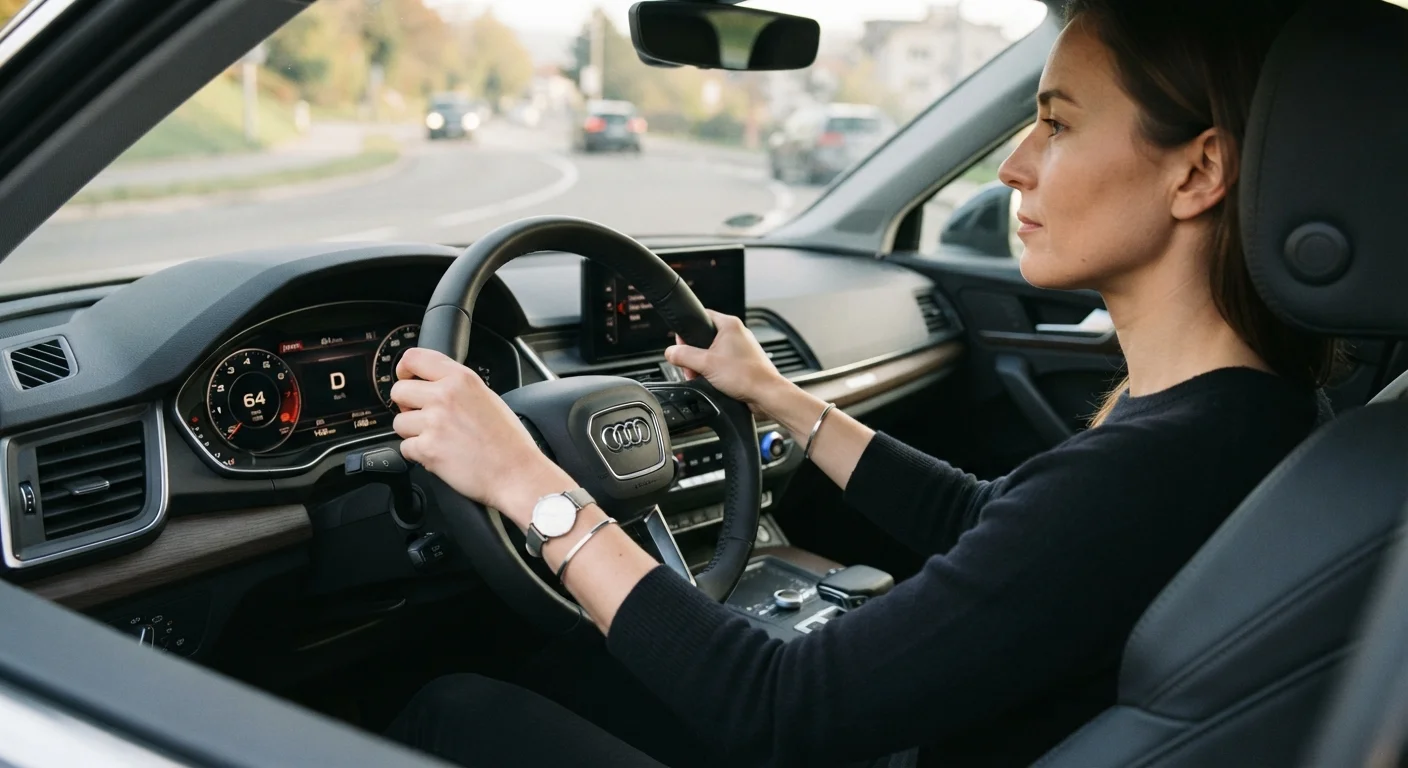
Many vehicles allow the steering column to tilt (up and down) and telescope (in and out). Set the wheel so it sits comfortably in front of your chest - not in front of your face. You should be able to see the instrument cluster (speedometer, warning lights) without the wheel rim blocking your view. Pull the wheel toward you slightly if needed, then lock the adjustment lever firmly before driving.
Place your hands at nine and three
Think of the steering wheel as a clock face. Place your left hand at the nine o'clock position and your right hand at the three o'clock position. Grip the wheel firmly but without tension - a white-knuckle grip tires your arms quickly and reduces fine steering sensitivity. Keep both hands on the wheel whenever possible; one-handed driving reduces your ability to correct a skid or sudden swerve.
Set your mirrors last
Only adjust your mirrors once your seat and posture are finalized. From your correct driving position, set the rearview mirror to frame the full rear window. For each side mirror, adjust so just a sliver of your vehicle's rear quarter panel is visible at the inner edge - this maximizes the view of the lane beside you and reduces blind spots. Check all three mirrors before pulling away. For a deeper look at getting your vehicle properly organized before driving, see our pre-drive checklist.
Check Your Setup Every Time You Share a Car
If you share a vehicle with another driver, always run through your seat and mirror setup before moving off. A minute spent adjusting is far less costly than driving with compromised control or visibility. Consider marking your preferred seat-track position with a small piece of tape to speed up the process.
Never Adjust Your Seat While Moving
All seat, mirror, and steering column adjustments must be made before you start driving. Reaching for levers or controls while the vehicle is in motion is a significant distraction and can cause you to lose vehicle control. Pull over safely if you need to re-adjust mid-journey.
Once your position is set, you'll be better placed to handle the kinds of on-road situations covered in our guide to roundabouts, merging, and blind spots. Your owner's manual is also worth consulting for vehicle-specific adjustment mechanisms - see our piece on making the most of your owner's manual for guidance.