

Key Takeaways
Why Drywall Holes Are Easier to Fix Than They Look
Drywall - the gypsum board that makes up most interior walls in modern homes - is durable enough for everyday life but vulnerable to impacts, hardware removal, and even humidity-driven nail pops. The good news is that the same material properties that make it easy to damage also make it straightforward to repair. Unlike plaster or masonry, drywall accepts joint compound readily, dries relatively fast, and sands smooth without specialist tools.
Most visible damage falls into a few predictable categories: small fastener holes left by nails or picture hooks, medium holes from door handles or pulled anchors, and the occasional larger gap from a doorknob strike or accidental impact. Each type has a clear method, and none of them require you to replace an entire wall panel.
It's worth knowing, however, that common home repair myths can lead first-timers astray - including the belief that any patch job will look obvious or that professional results are impossible without professional tools. Neither is true when you follow a methodical approach.
What you will need
What You'll Need Before You Start
Gathering your materials before you begin prevents mid-project trips to the hardware store and helps you stay focused. The list is short and affordable for most repairs.
Putty knife or drywall knife (4-6 inch)
Spreads and smooths joint compound evenly over the patch area.
Self-adhesive mesh patch (for holes wider than ½ inch)
Provides a rigid backing that holds the joint compound in place over open holes.
Pre-mixed joint compound (also called drywall mud)
Fills the hole and creates a smooth, paintable surface when dry.
Fine-grit sandpaper (120-150 grit)
Smooths each dried coat of compound for a flush, seamless finish.
Primer
Seals the repaired area so paint adheres evenly and doesn't look dull or patchy.
Sanding block or sponge
Keeps sandpaper flat against the wall for consistent, even sanding.
Dust mask and safety glasses
Protects you from fine drywall dust during sanding.
Check for Wiring Before Cutting
Before enlarging any hole or cutting into the wall, verify there are no electrical cables running behind that section of drywall. Our guide on locating wall studs before you drill also covers identifying safe zones. If you suspect wiring is nearby, stop and consult a licensed electrician before proceeding.
Keep in mind that drywall compound, primer, and paint are the three-layer system that produces a truly invisible repair. Skipping any layer - especially primer - tends to show up as a dull patch even after the paint color matches perfectly.
Step-by-Step Patching Instructions
Follow these steps in order, respecting the drying times between coats. Most of the actual working time is brief - it's the waiting that fills an afternoon.
Assess the hole and choose the right method
Size determines your approach. Tiny holes from nails or screws (under ½ inch) can be filled directly with lightweight spackling compound and a fingertip. Holes up to about 4-6 inches wide need a self-adhesive mesh patch for support before any compound is applied. Eyeball the damage, remove any loose paper or crumbled gypsum around the edges with your putty knife, and press the edges flat.
Apply a self-adhesive mesh patch (for holes over ½ inch)
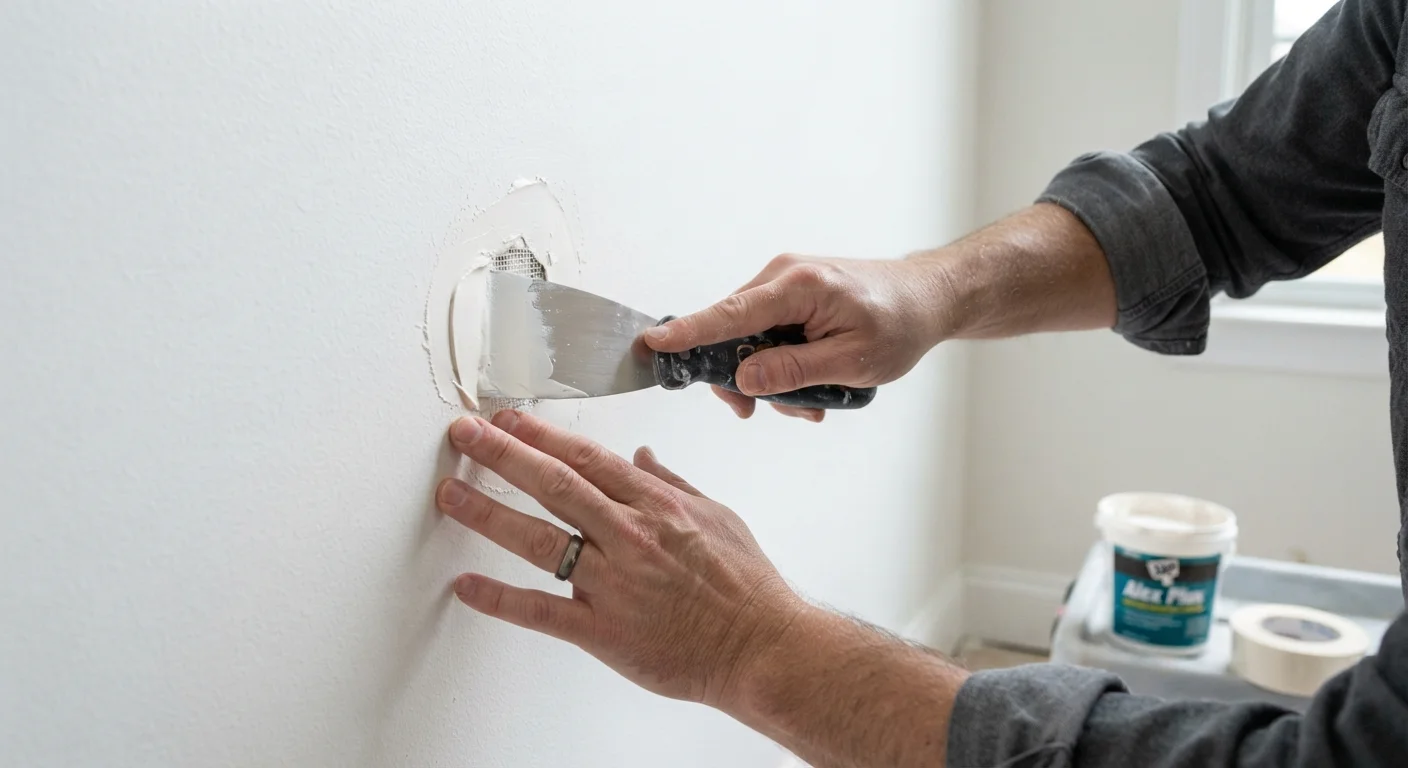
Peel the backing off the mesh patch and center it firmly over the hole, pressing all edges flat against the wall. The mesh acts as a scaffold - joint compound bonds to it rather than spanning open air, which is what prevents the repair from cracking or caving in over time. Skip this step only for true pinhole repairs.
Apply the first coat of joint compound
Load your putty knife with a modest amount of pre-mixed joint compound. Spread it over the mesh patch in smooth, diagonal strokes, working the compound into the mesh and out slightly beyond its edges (about 2 inches past the patch on each side). The goal of the first coat is coverage, not perfection - some ridges and tool marks are fine at this stage.
Let it dry completely, then sand lightly
Joint compound changes color as it dries - it shifts from a darker grey-tan to an even, chalky white. This can take anywhere from 2-8 hours depending on the thickness of the coat and humidity in the room. Once fully dry, sand lightly with 120-150 grit sandpaper using a flat sanding block, removing ridges and high spots without digging into the mesh. Wipe away dust with a barely damp cloth.
Apply one or two additional coats
Apply a second thin coat of compound, extending it slightly further than the first. This coat should be noticeably smoother. After drying and sanding, check the surface with a raking light (hold a flashlight parallel to the wall in a darkened room) to spot any remaining low spots or ridges. A third coat is often needed for a truly flat finish. Each coat should be thinner than the last.
Prime the repaired area
Apply a coat of drywall primer to the patched section before painting. Unprimed compound is porous and will absorb paint unevenly, creating a dull or flat-looking spot - sometimes called a 'picture frame' effect - that's obvious even with matching paint. Let the primer dry fully according to the product's label directions.
Match texture and paint
If your walls have a texture (orange peel, knockdown, or smooth), replicate it before painting. For light textures, a small sea sponge or a crumpled plastic bag dabbed lightly over wet compound can mimic the pattern. Once the texture is dry and primed, paint the patch with your wall color. For the closest match, paint the entire wall panel from corner to corner rather than just the spot - this avoids visible colour variation. Our guide on painting a room for the first time walks through prep and technique in detail.
Thin Coats Always Win
It's tempting to fill a hole in one thick pass, but joint compound shrinks as it dries. Applying two or three thin coats - sanding lightly between each - produces a flatter, more durable result than one heavy application. Patience here is the single biggest difference between an amateur and a professional-looking repair.
Larger Damage May Need a Pro
Holes wider than roughly six inches, or damage that exposes insulation, framing, or any part of your home's electrical or plumbing systems, go beyond a simple patch job. See what home repairs require a licensed professional to understand where DIY ends and expert help begins.
After the Patch: Keeping Walls in Better Shape
Once your repair is complete and painted, a few habits help prevent similar damage in the future. Install proper door stops if a swinging door is the culprit - rubber bumpers or wall-mounted stops cost very little and protect both the wall and the door hardware. When hanging anything heavier than a light picture frame, locate a wall stud for a secure anchor rather than relying on hollow-wall fasteners alone.
For a wider home maintenance perspective, projects like weatherstripping doors and windows follow the same principle: small, systematic work done correctly produces lasting results and builds real DIY confidence over time.